OBJECT POOLER - UNITY C#
10/8/2021
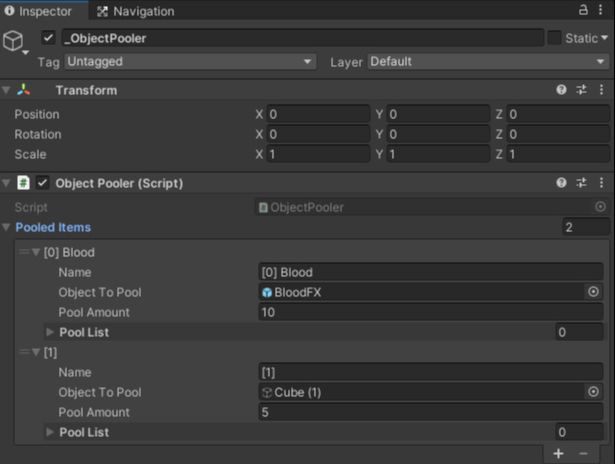
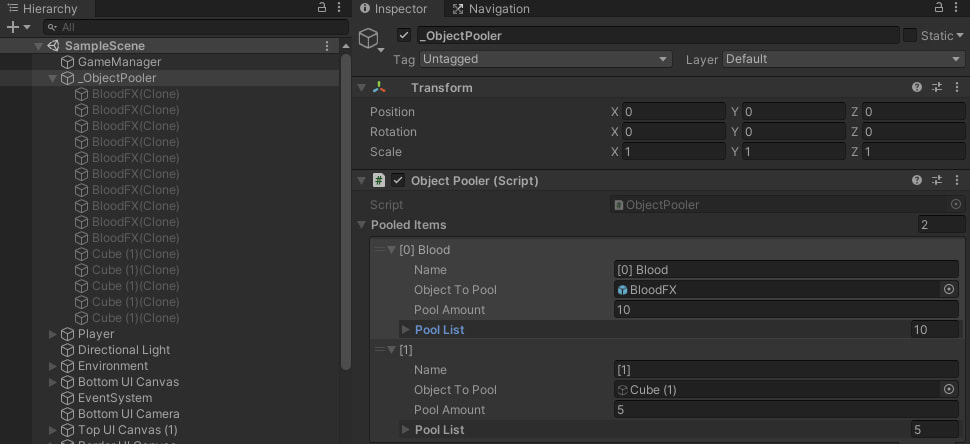 Instead of repeatedly creating and destroying gameobjects at runtime (bullets for example), you can create a set amount at the start of runtime and call them in the scene when they are needed. When you don't need them, you can then set them inactive in the scene and call on them when needed again. Object Pooling is a great way to optimize your project and lighten your games garbage collection. (Full Object Pooler Script at the end of blog post.) There are more than a few ways you can implement this. For my current project I decided to have a GameObject called _ObjectPooler and added one script that takes care of all the pooled objects in the scene. This can be altered so you can create a 'Pool Item' class in any other script and call them separately if that's more your style, but for me, at least for the moment, it's simpler to have all the gameobjects being pooled in one location, and calling them in from one location. I created a script called 'ObjectPooler' and above the class I created a new class called PoolItem. Next I made the ObjectPooler class a singleton, so it can be easily called from other scripts. (Only one instance of the script is allowed in the game scene). Just below the 'public static ObjectPooler instance;' line, I created a list from the class PoolItem.
Next, we add the code that will pool our objects. Write the following code after the Start() function. This will now pool objects into your scene when you play your scene. But we still need to call them to actually use them. Right below the code we just wrote we add a function that will call a pooled gameobject when we want to use it. This piece of code, when called, will go through each pooled object type we want to call and if one in the list is not active in the scene, then it will return that value/gameobject. Now we have the gameobject we want and can set it active. In the current project I'm working on, I pooled some 'blood' gameobjects, which are just animated sprite gameobjects. So when I hit an enemy I will grab a blood gameobject from the pool, change its position and set it to active. When I don't need to show the blood effect anymore, I will call setActive(false) to the blood gameobject, so it can be called again at a later time when needed. Full ObjectPooler Script
To grab a pooled object (separate script)
When your finished with the object for the moment.
0 Comments
HIDING BEHIND A WALL? (UNITY & C#)
11/4/2019
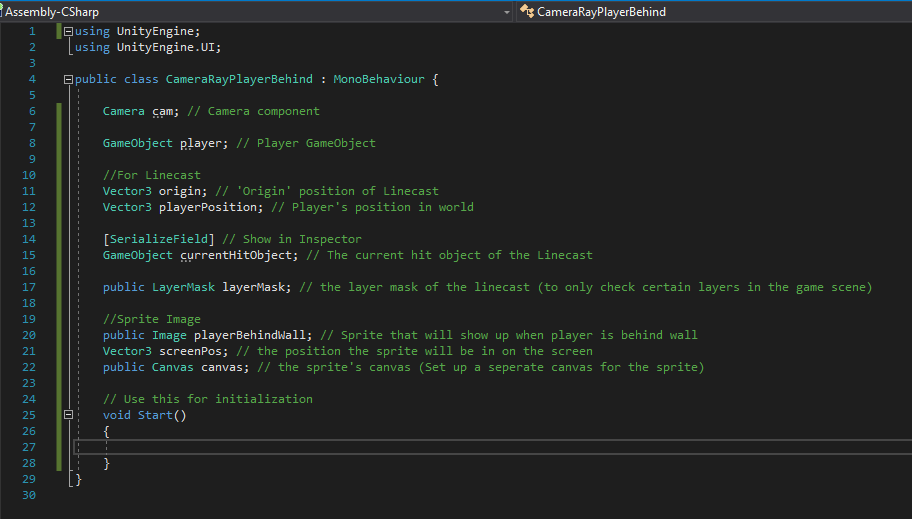
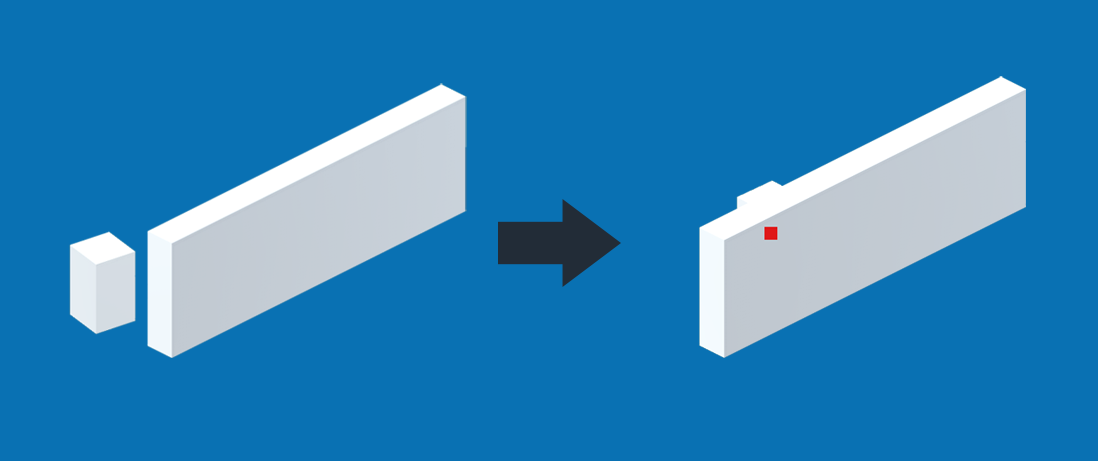 If the platform your building your game to doesn't support a specific custom shader that contains the ability to see the player through a wall, I have an alternate way that may help you with that problem. I had been messing around with a New Nintendo 3DS development kit, and found out that it doesn't support custom shaders. Specifically, a shader I wanted to use which gave the ability to see the player behind a wall, so the actual person playing the game knows where the character is on screen. This alternate option uses a Linecast from the Camera game object to the position of the Player, and then when the player is behind a wall a sprite pops up on the screen where the player is positioned. You can imagine that the sprite could be some quirky animating image of the face of the main character. I have a couple of other scripts running during the game, a player controller script, a camera follow, etc. I will only go through the ability to find where the player is when him/her is behind a wall. Also, I am using an orthographic projection on the camera, but not to worry because this alternate way will still work if your camera is in a perspective view. Full C# Script and Example at bottom of blog post. Checked with Unity version: 2018.3
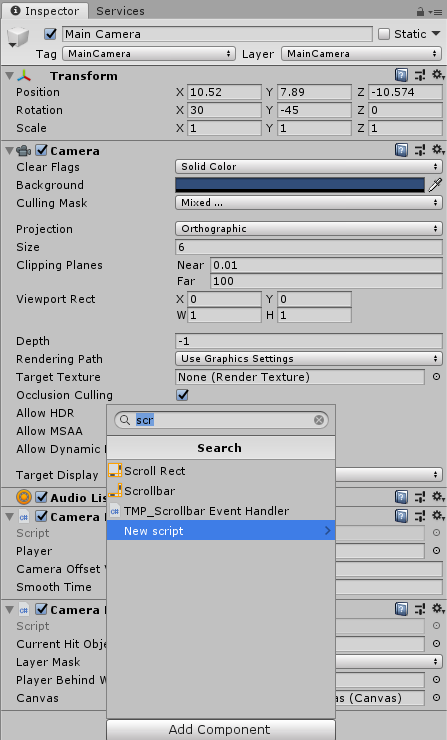
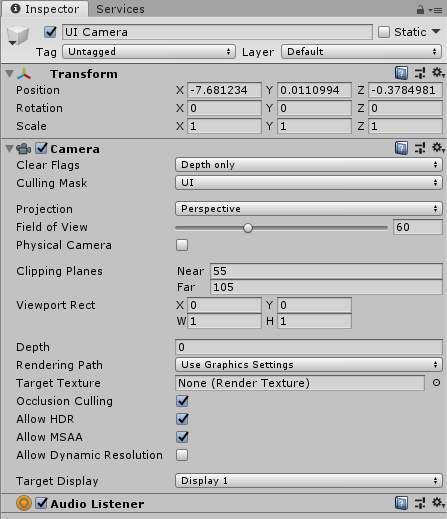
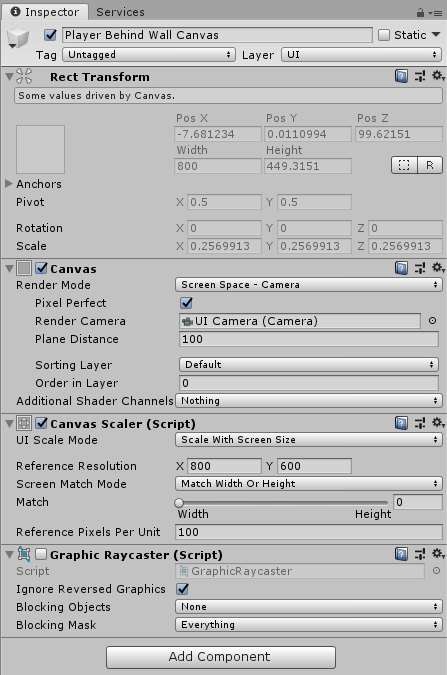
 Then back in Unity, create/add a player game object if you haven't yet (e.g. Create -> 3D object -> Cube), create a Canvas (Create -> UI -> Canvas), and name them anything you like. On that canvas I changed the Render Mode to Screen Space - Camera, and also created another Camera game object that takes care of the UI elements in the game. I then dragged the UI Camera in the Render Camera slot on the Canvas. You can choose to do this or just stick to one camera. (There are no scripts on the UI Camera, just on the Main Camera). If your using two cameras don't forget to uncheck UI on the Culling Mask of the Main Camera and select the UI layer on the Culling Mask on the UI Camera and nothing else. Also make sure the Layer of each game object is correctly displayed just like the pictures below. (Main Camera Layer = Main Camera, Canvas Layer = UI).
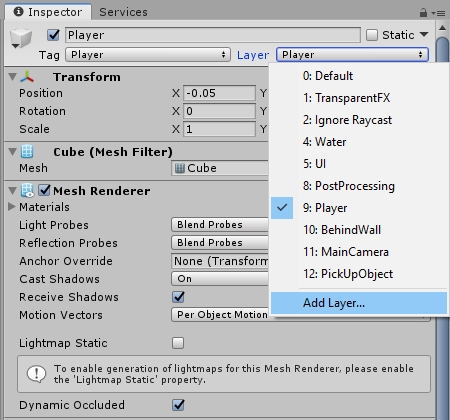
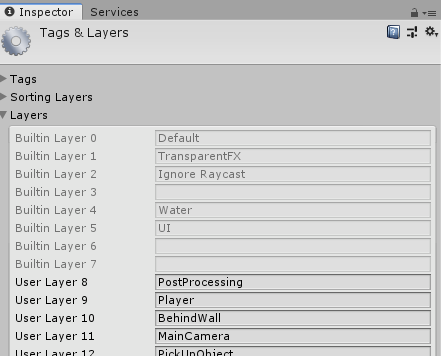
Now create an image (Create -> UI -> Image) and add it to your canvas, This is going to be the sprite that shows up on the screen when the player is behind a wall (make sure you choose a sprite for your UI Image). Select the Main Camera and in the boxes below on the script drag your Image and Canvas to the script. 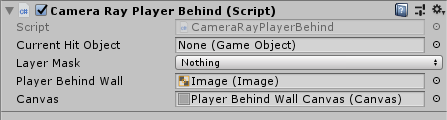 After that, it's time to create some layers. On the Player, go to the Layer option in the Inspector tab, and add Layer. Now add two new Layers, name one Player and the other BehindWall.
Make sure you set the Player layer onto the player after creating it. And now create a new game object or if you have a wall in your scene, make sure the layer of that object/wall is set on BehindWall. You can also open up the Project Settings (Edit -> Project Settings...) and uncheck a couple of things on the Layer Collision Matrix on the Physics tab.  With that now done, we can go back and select the Main Camera and now on the script we can choose the Player and BehindWall layers on the LayerMask. 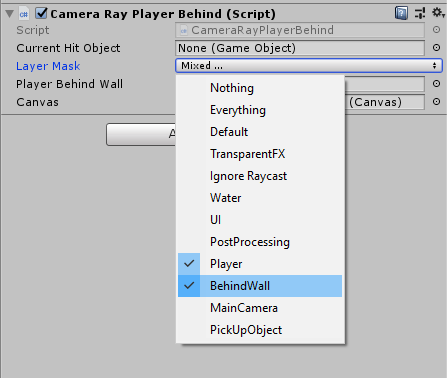 Back to the script. In the Start function add these lines: 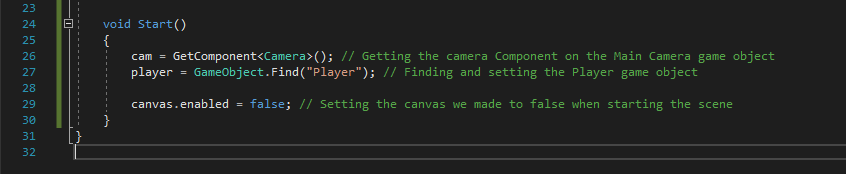 Now let's set up the Linecast. (you can also find out more on Linecasts here .) 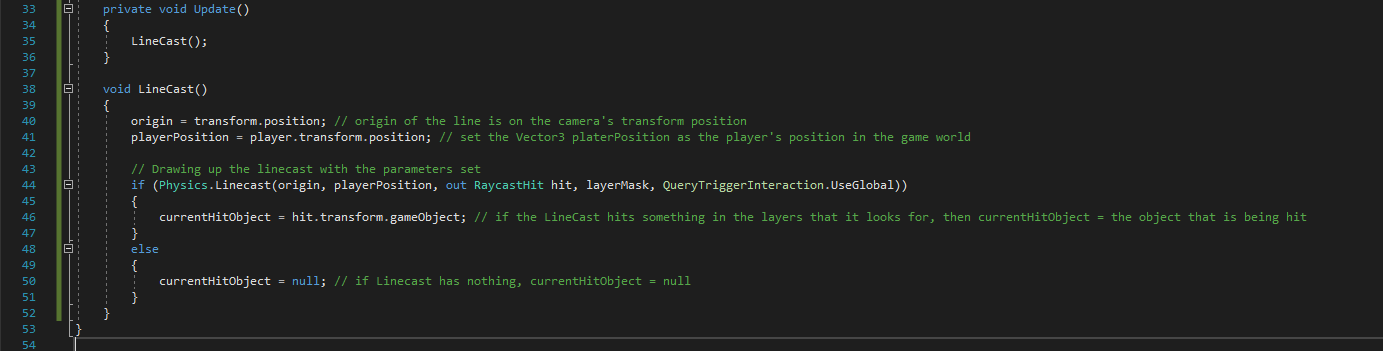 After we have set up the Linecast, we can now use its information. So that if the Linecast is not hitting the Player, which will only happen when a wall (with the Layer set to BehindWall) is between the line and the Player. We then show the sprite, which will follow the player behind the wall. 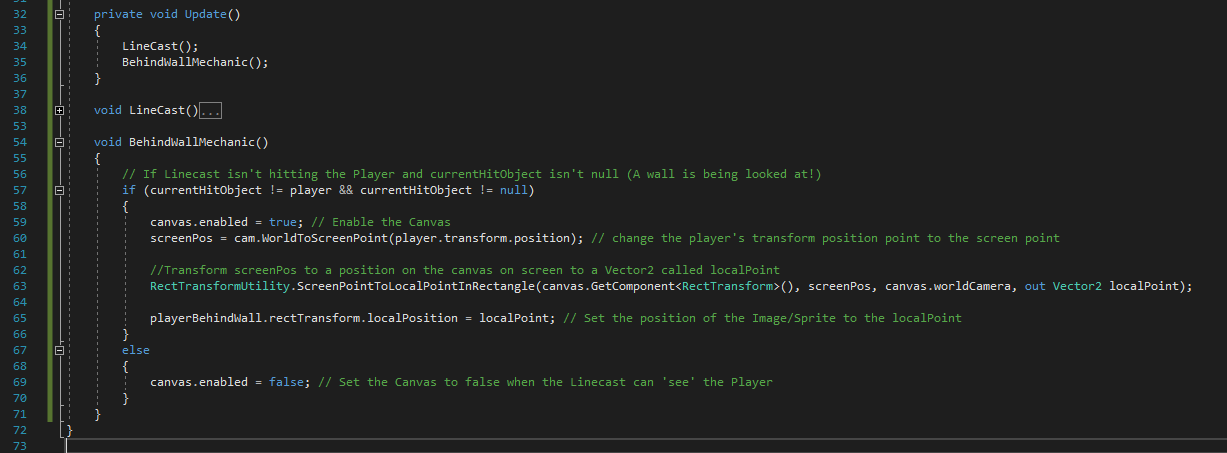 When the Player is behind a wall the sprite image will pop up and follow the player as long as you are behind a wall. Another thing we could add just below this piece of code to make it easier to visualise the line is this:  Now when we press the Play button in the Unity Editor a line will be drawn in the Scene view when selecting the Main Camera. 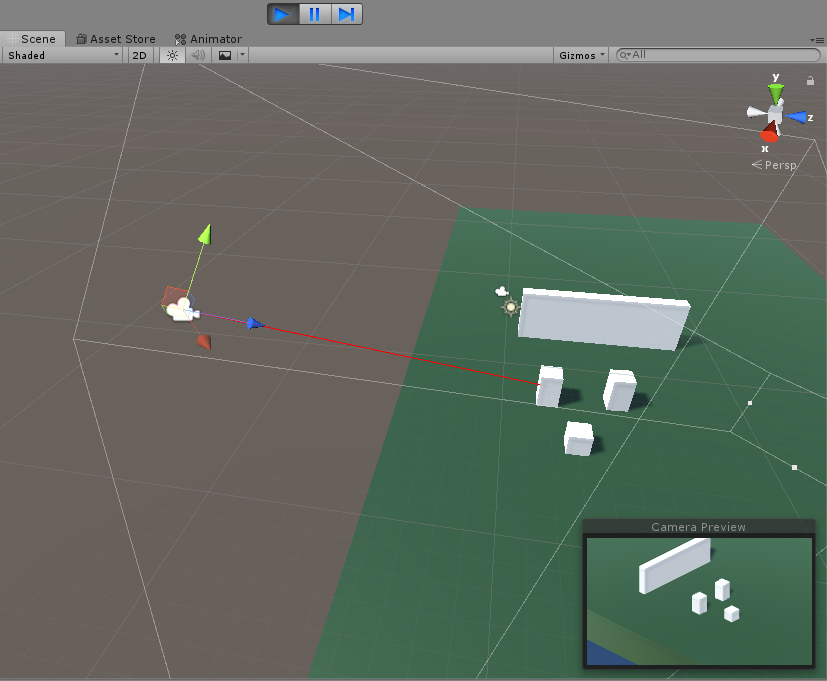
Full Script
P.S./Edit: Instead of enabling and disabling the canvas, you can also just turn the actual Image Gameobject on and off.
|
Archives
May 2022
Categories |


 RSS Feed
© Stefan Dolidis